
Colour correction is an important part of video editing tools. It helps make videos look natural and clear. Sometimes, cameras do not capture colours as they should. The lighting may be too bright or too dull. Colours may look off, making the video less appealing. Fixing these issues can improve video quality and keep viewers interested.
With the right tools, anyone can adjust colours without much effort. Even beginners can learn the basics and apply them easily. A well-balanced video looks more polished and professional. It helps create the right mood and makes the content more engaging.
CapCut desktop video editor is a popular tool for colour correction. It has many features that help improve video quality. Some tools are free to use, while others need payment. Before starting, it is good to know which features are available. By making small changes to brightness, contrast, and colour balance, anyone can enhance their videos and make them look their best.
Why Colour Correction is Essential for Video Enhancement
The colour correction makes a video look natural and balanced. It helps adjust brightness, contrast, and colours so that every detail is clear. Without it, a video may look too dark, too bright, or have unnatural colours.
Sometimes, poor lighting can make a video look dull. A bright outdoor scene might wash out details, while a dark indoor shot can hide important parts. Colour correction fixes these issues and makes the video look just right.
It also makes colours look more natural. If a camera captures a scene with a blue or yellow tint, the right adjustments bring back true-to-life colours. This makes the video more professional and easier to watch.
Good colour correction also helps set the right mood. A warm tone makes a scene feel cozy, while a cooler tone creates a calm or serious feel. This can make a big difference in how people experience a video.
Another way to improve videos is by making them easier to follow. Using tools like an AI caption generator adds text that matches the spoken words. This helps viewers understand the content better, even if they watch without sound. Together, these tools make videos clearer and more engaging.
Key Aspects of Basic Colour Correction
Exposure Adjustment
Exposure affects how bright or dark your video looks. If a video is too dark, details get lost. If it’s too bright, the colours look washed out. Adjust brightness and contrast to get a balanced look. This makes the subject stand out while keeping the background clear and natural.
White Balance
White balance controls the colour temperature of a video. If the colours look too blue or too yellow, the video may feel unnatural. Adjusting the white balance helps correct this. Warmer tones add warmth, while cooler tones create a fresh look. This ensures colours match how they appear in real life.
Saturation & Vibrance
Saturation changes how rich or dull colours look. If colours are too intense, they can seem unrealistic. If they’re too weak, the video may feel lifeless. Vibrance helps boost dull colours without affecting already bright areas. Adjust these settings carefully to make colours pop while keeping a natural appearance.
Colour Grading vs. Colour Correction
Colour correction fixes colour issues to make the video look natural. Colour grading, on the other hand, adds a specific mood or style. Think of colour correction as making a video look “right” and colour grading as making it look “unique.” Both play a role in creating a polished video.
Shadows, Highlights, and Midtones
Shadows control dark areas, highlights adjust bright spots, and midtones affect everything in between. Balancing these settings prevents details from getting lost in extreme light or darkness.
Enhancing Videos with Text-to-Speech
Adding text-to-speech helps improve video engagement. A clear voice can guide viewers, explain changes, or add narration. This keeps the audience connected throughout the video.
Steps to Perform Colour Correction Using CapCut
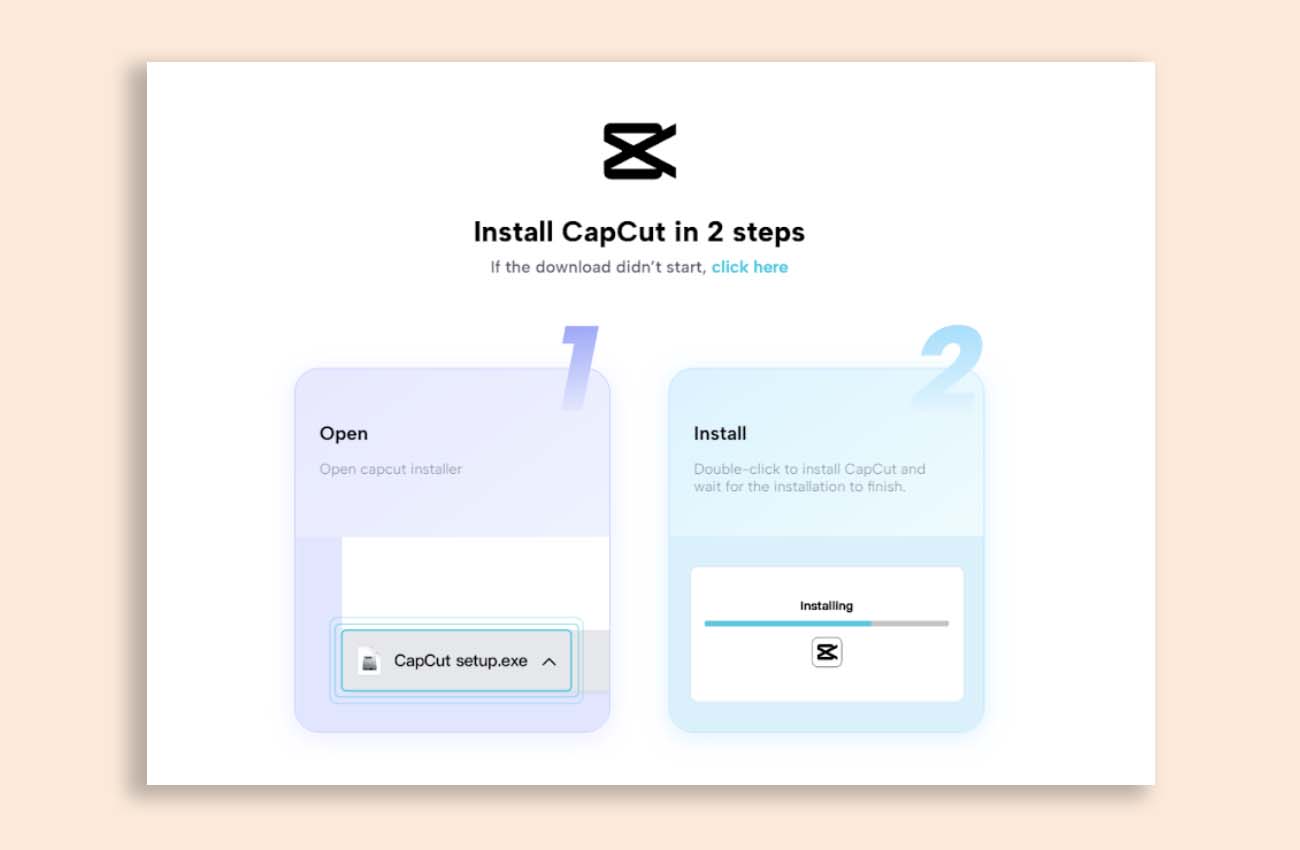
Step 1: Download and Install CapCut
To start, download CapCut PC a video editing software from its official website. This ensures you get the latest version with all the features. After downloading, install the software by following the on-screen instructions. Once installed, sign up for an account to access editing tools.
CapCut desktop video editor offers both free and paid features. While you can do basic colour correction without cost, some advanced tools require payment. Before moving forward, check if the free options meet your needs. Now, you’re ready to edit and enhance your videos with just a few clicks.
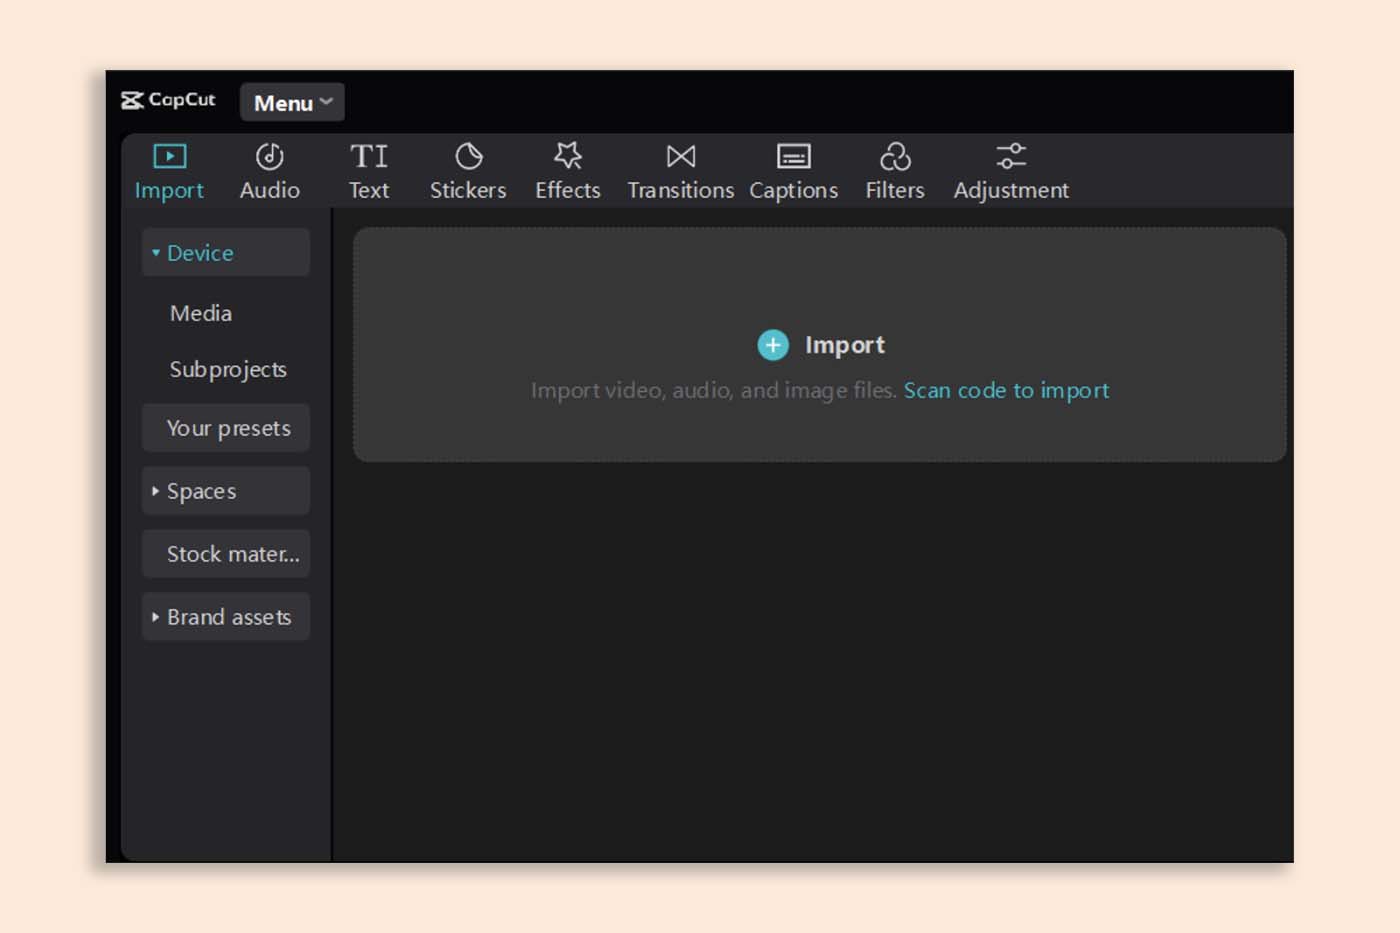
Step 2: Import Your Video
After launching CapCut desktop video editor, click the Import button to upload your video. Select the file from your computer and wait for it to load. Once imported, drag the video onto the timeline at the bottom of the screen.
At this stage, you can trim unwanted sections or arrange multiple clips if needed. A well-organized timeline makes the editing process smoother. Once your video is in place, you’re ready to start adjusting its colours and improving its overall look.
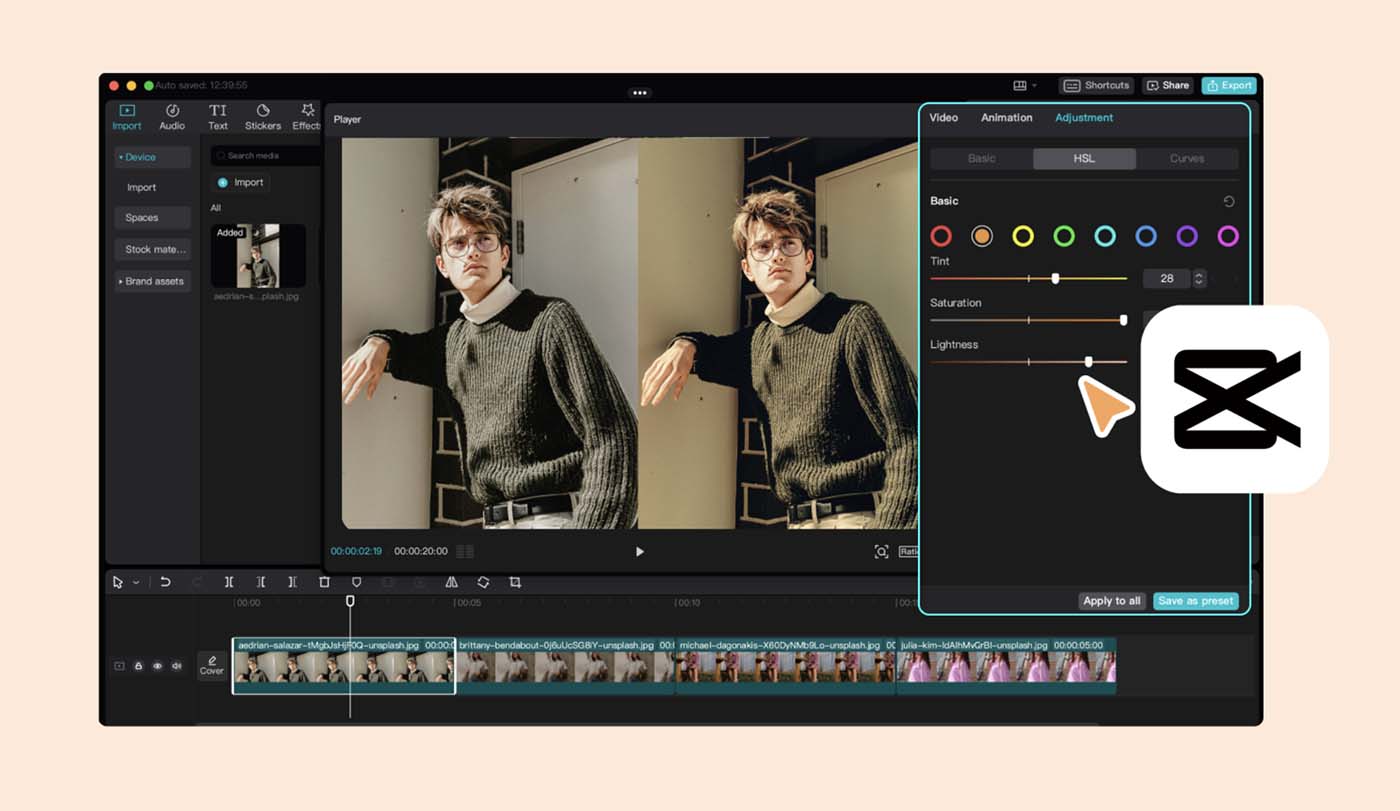
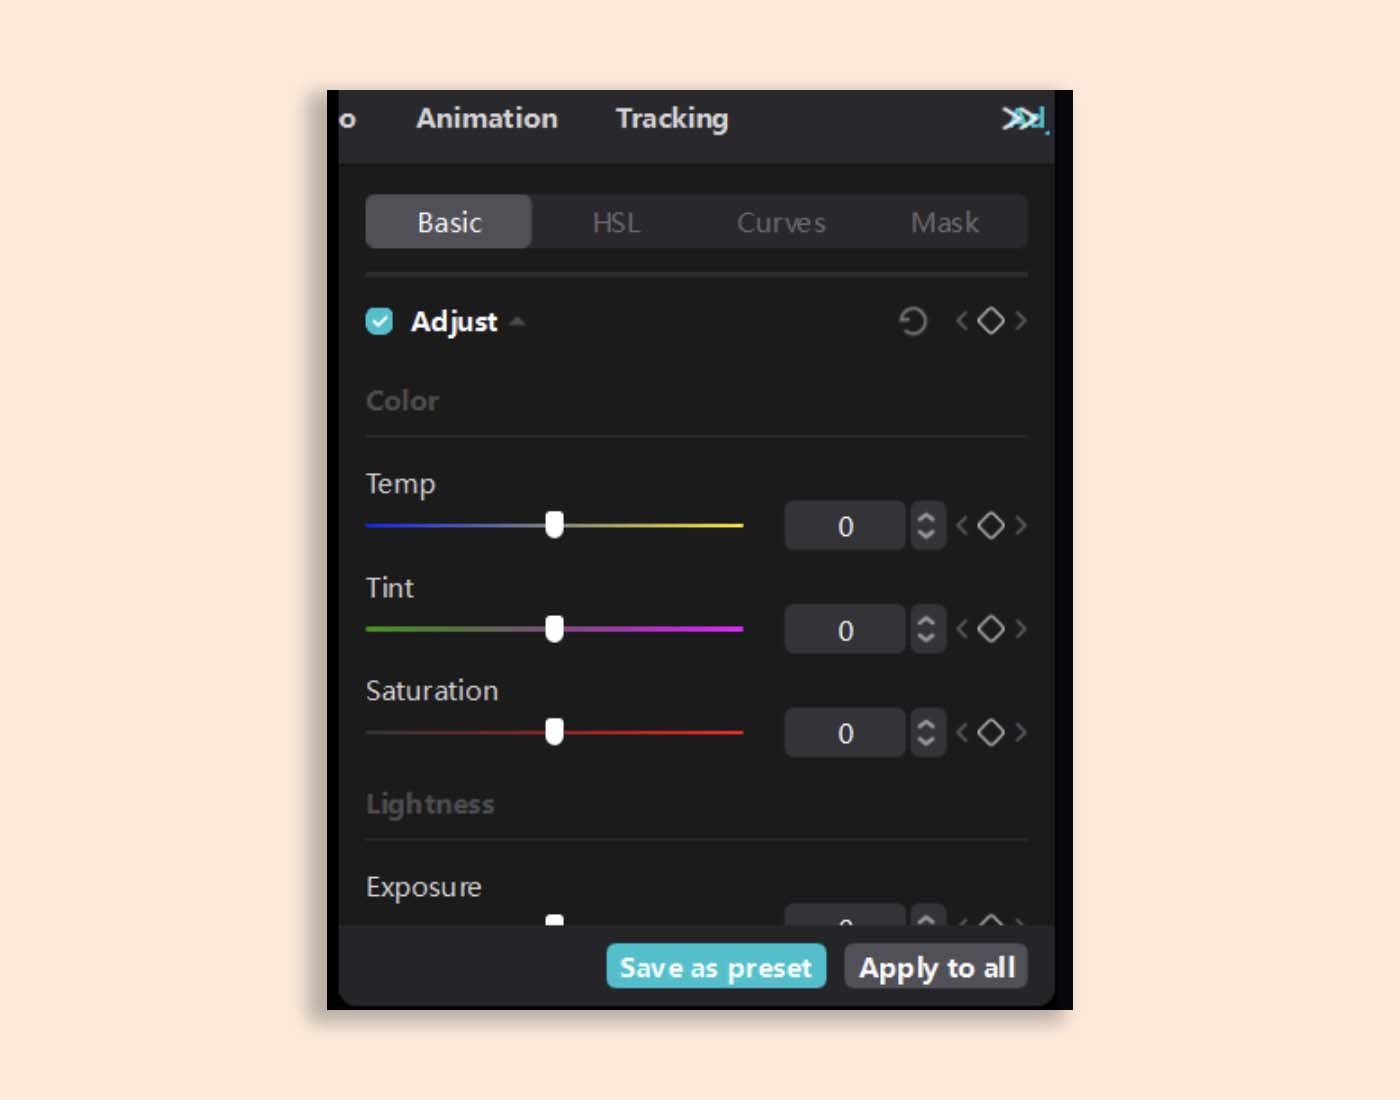
Step 3: Adjust Basic Colour Settings
Now, click on the Colour Adjustment panel to begin making changes. Start with brightness and contrast to ensure the lighting looks natural. Then, fine-tune the saturation to make colours more vibrant or muted, depending on the effect you want.
Next, adjust the white balance. If your video looks too warm or too cool, shift the temperature slider to correct it. This helps achieve a more realistic and balanced colour tone.
If you want to speed up the process, you can use CapCut’s preset filters. These offer quick adjustments that can improve your video with a single click. However, manual adjustments provide more control.
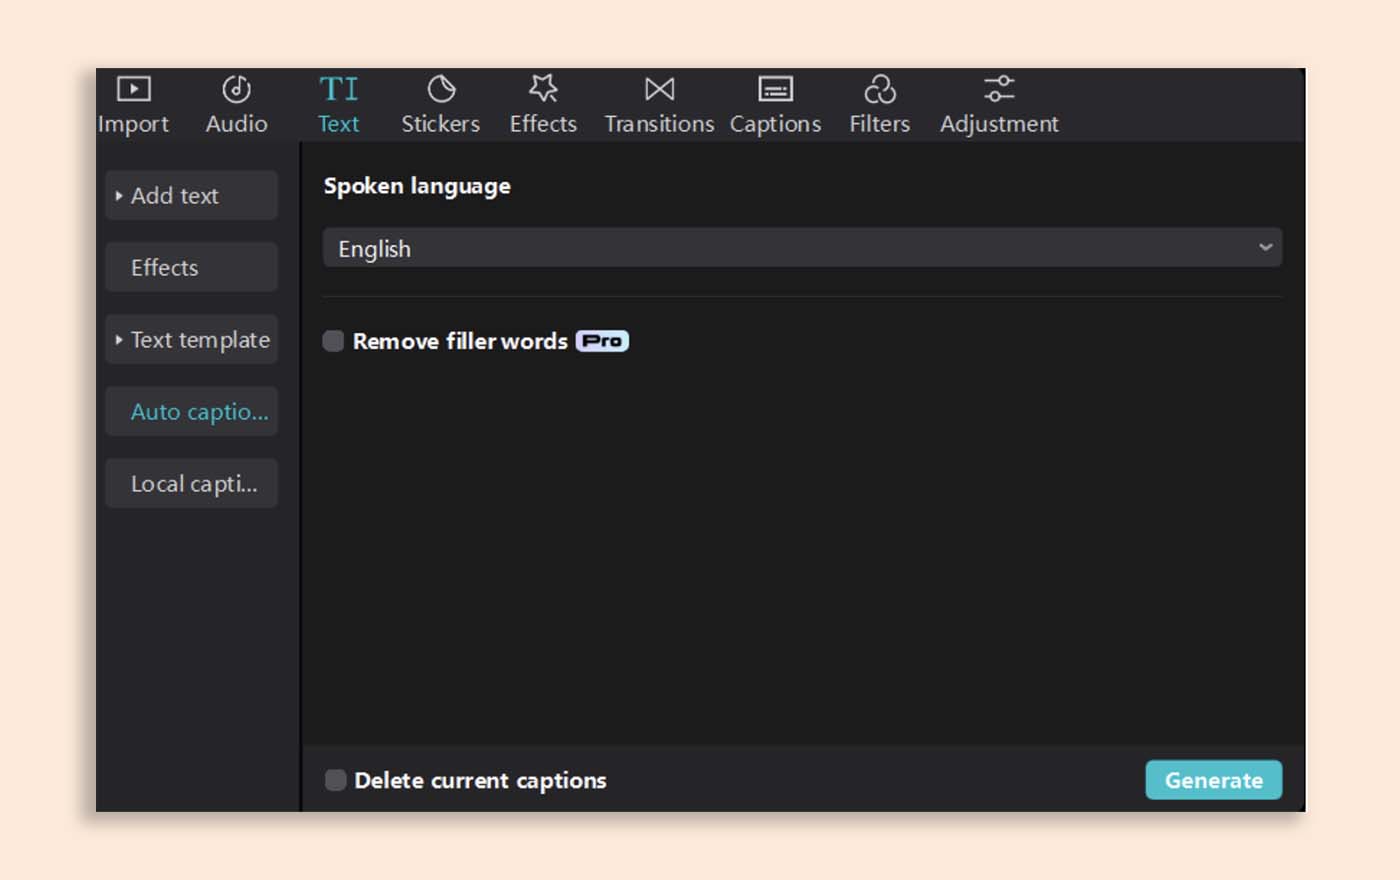
To make your video even more engaging, consider adding captions with an AI caption generator. This tool automatically creates subtitles, making content more accessible and professional.
Step 4: Apply Colour Grading
If you want to create a specific mood, try colour grading. This step enhances the video’s style and gives it a unique look.
CapCut desktop video editor offers LUTs (Look-Up Tables) that apply cinematic colour effects in seconds. You can experiment with different LUTs to find the one that fits your video best. If needed, fine-tune the settings to achieve a more polished look.
Once satisfied, compare the edited version with the original to ensure the changes improve the
video. Then, move on to the final step.
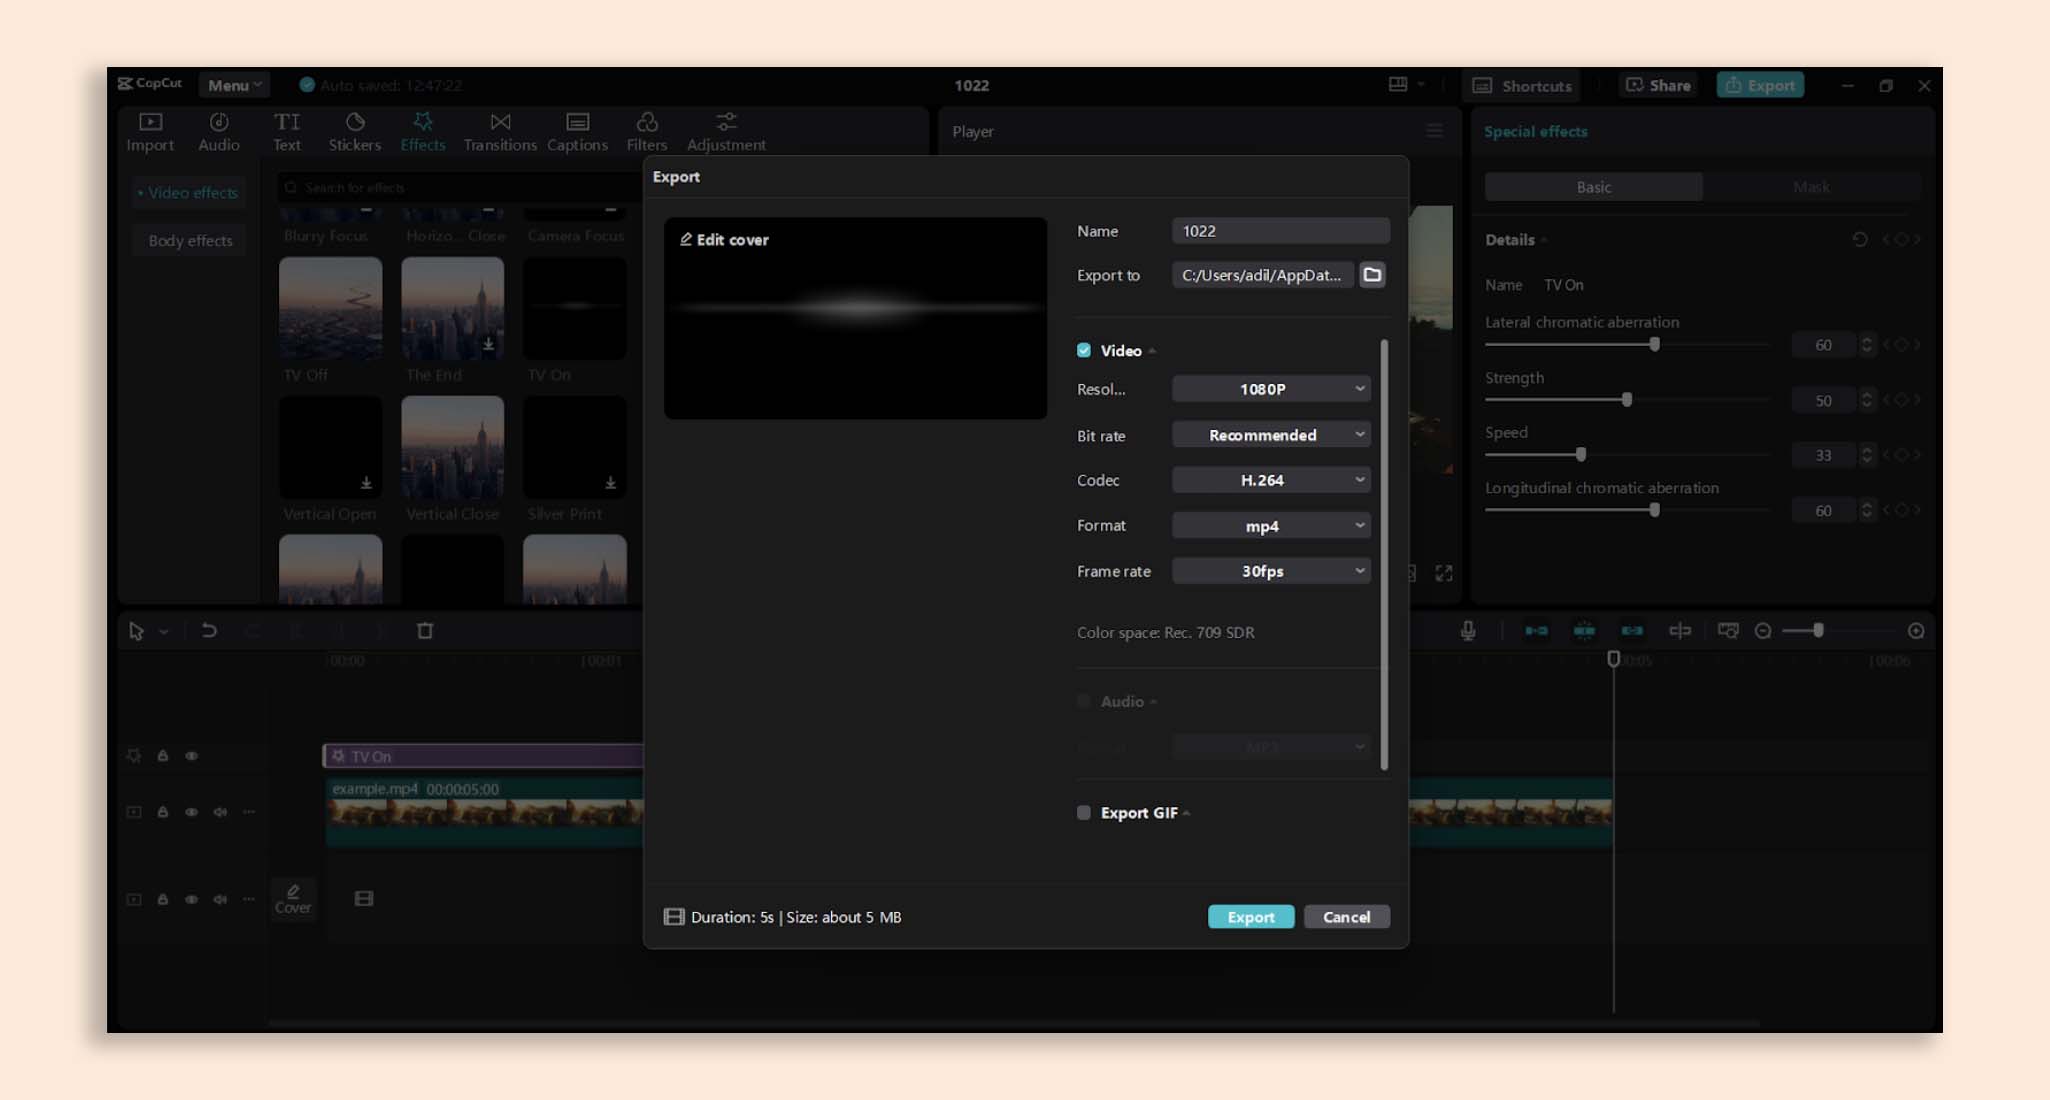
Step 5: Export and Save Your Video
Before exporting, review the final edit to ensure everything looks right. Then, click the Export button and choose the desired resolution, format, and frame rate. For the best quality, select 1080p or higher.
Once the settings are ready, export the video and wait for the process to complete. When finished, save the file to your computer. You can now upload it to YouTube, share it on social media, or use it for any project.
With these steps, you can easily enhance your video’s colours and create high-quality content. Now, go ahead and try it for yourself!
Conclusion
The good colour correction makes a big difference in video quality. It helps videos look clear and professional. If colours are too dark or too bright, small adjustments can fix them.
CapCut desktop video editor has great tools for colour correction. But some advanced features are not free. Even with the basic tools, you can improve your videos a lot. Try changing brightness, contrast, and colours to see what works best.
Keep experimenting. The more you practice, the better your videos will look. Over time, you will find a style that fits your content.
Start today. Try simple edits and see the results. Soon, you will be making high-quality videos with ease.


